Crimp Rj45
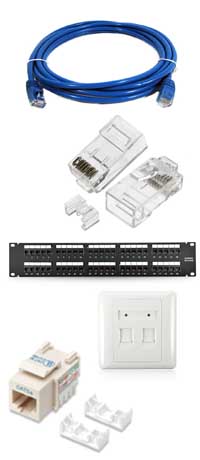
You can quickly and easily crimp an RJ-45 to a cable with or without a crimping tool. If you have a crimping tool, strip away a portion of the sheath, untangle and arrange the wires in the correct order, fit them into the connector, and use the crimping part of your tool to squeeze the small pins into the wires and secure the connector. If you don’t have a crimping tool, no problem! Use a pair of scissors or a utility knife to cut away a section of the sheathing at the end of the cable, untwist and arrange the small cables in the right order, put them into the RJ-45 connector, and use a small, flathead screwdriver to press down each of the pins.
Using a Crimping Tool
Strip the cable back 1 inch (25 mm) from the end. Insert the cable into the stripper section of the tool and squeeze it tight. Then, rotate the crimping tool around the cable in a smooth and even motion to create a clean cut. Keep the tool clamped and pull away towards the end of the wire to remove the sheathing.
- The stripping section is a round hole near the handle of the tool.
- The sheathing should come off cleanly, leaving the wires exposed.
Untwist and straighten the wires inside of the cable. Inside of the cable you’ll see a bunch of smaller wires twisted together. Separate the twisted wires and straighten them out so they’re easier to sort into the right order.
- Cut off the small plastic wire separator or core so it’s out of the way.
- Don’t cut off or remove any of the wires or you won’t be able to crimp them into the connector.
- There are 8 wires in total that need to be arranged in the right sequence.
- Note that the wires labeled Orange/White or Brown/White indicate the small wires that have 2 colors.
- The cutting section of the tool will resemble wire cutters.
- The wires must be in an even line to be crimped into the RJ-45 connector properly. If you cut them in an uneven line, move further down the wires and cut them again.
Insert the wires into the RJ-45 connector. Hold the RJ-45 connector so the clip is on the underside and the small metal pins are facing up. Insert the cable into the connector so that each of the small wires fits into the small grooves in the connector.
- The sheathing of the cable should fit just inside of the connector so it’s past the base.
- If any of the small wires bend or don’t fit into a groove correctly, take the cable out and straighten the wires with your fingers before trying again.
- The wires must be inserted in the correct order and each wire must fit into a groove before you crimp the connector.
Stick the connector into the crimping part of the tool and squeeze twice. Insert the connector in the crimping section of the tool until it can’t fit any further. Squeeze the handles to crimp the connector and secure the wires. Release the handles, then squeeze the tool again to make sure all of the pins are pushed down.
- The crimping tool pushes small pins in the grooves down onto the wires to hold and connect them to the RJ-45 connector.
Remove the cable from the tool and check that all of the pins are down. Take the connector out of the tool and look at the pins to see that they’re all pushed down in an even line. Lightly tug at the connector to make sure it’s attached to the cable.
- If any of the pins aren’t pushed down, put the wire back into the crimping tool and crimp it again.
Attaching RJ-45 Connectors without a Crimping Tool
Cut into the outer sheath of the cable with a pair of scissors. Take a pair of scissors and gently cut into the plastic sheath about 1 inch (25 mm) from the end of the cable. Make sure you don’t cut into the wires inside. When the scissors penetrate the sheath, rotate the cable and scissors to create a cut around the cable. Then, stick your fingertips under the sheath and pull it off towards the end.
- Don’t cut too deep when you make your initial incision.
Separate and straighten out the small wires in the cable. Use your fingers to untwist and straighten the exposed wires after you remove the sheath. If there is a plastic core or wire separator, cut it away with your scissors.
- Some of the wires have 2 colors on them, like the orange and white wire.
- The wires need to be even in order to fit into the grooves in the connector.
- If you cut the wires unevenly, move further down and cut them again so their ends are in a straight line.
Fit the wires into the grooves of the RJ-45 connector. Hold the connector so the metal pins or brackets are facing up and the clip is facing down. Hold the small wires together in the right order and slide them into the connector. They should fit into the grooves of the connector, with the end of the sheath of the cable fitting just past the base of the connector.
Press the pins down with a flathead screwdriver. Locate the small metal pins at the ends of the grooves of the connector. Use a thin, flathead screwdriver to push each of the pins down. Push the pins 1 by 1 so they’re pressed all the way into each wire.
- Be careful not to crack or break the plastic connector.
Tug on the end of the connector to make sure it’s secure. Double check that all of the pins are pressed into the wire, and give a light tug on the connector to make sure it won’t slide off. Each of the pins should be inserted at the same level to form an even line.
- Lightly shake the cable and listen for any rattling that could indicate that one of the pins isn’t secure.
Source: wikihow
Related products...
Network Cable
Network Cable
Network Cable





[ratings]